Consultine is a responsive, user-friendly, translatable and easy-to-use content management system. Using this CMS, you can easily build a nice, modern and clean agency, or business website that have almost all the pages like team member, about, service, project, blog, contact etc. You can build education website, lawyer website, gym and fitness website etc. whatever you want to do.
This CMS is developed using the popular PHP framework Laravel. So, it can easily be customized by other programmers. Developers will be able to understand the source code easily and can modify the database and files if needed.
The source code of this script is very easy and clean. The interface is user-friendly. Non-technical users can modify every contents, photos etc.
Laravel 12
This CMS script has the following features:
The Laravel framework has a few system requirements. You should ensure that your web server has the following minimum PHP version and extensions:
In order to install the CMS, please follow these steps:
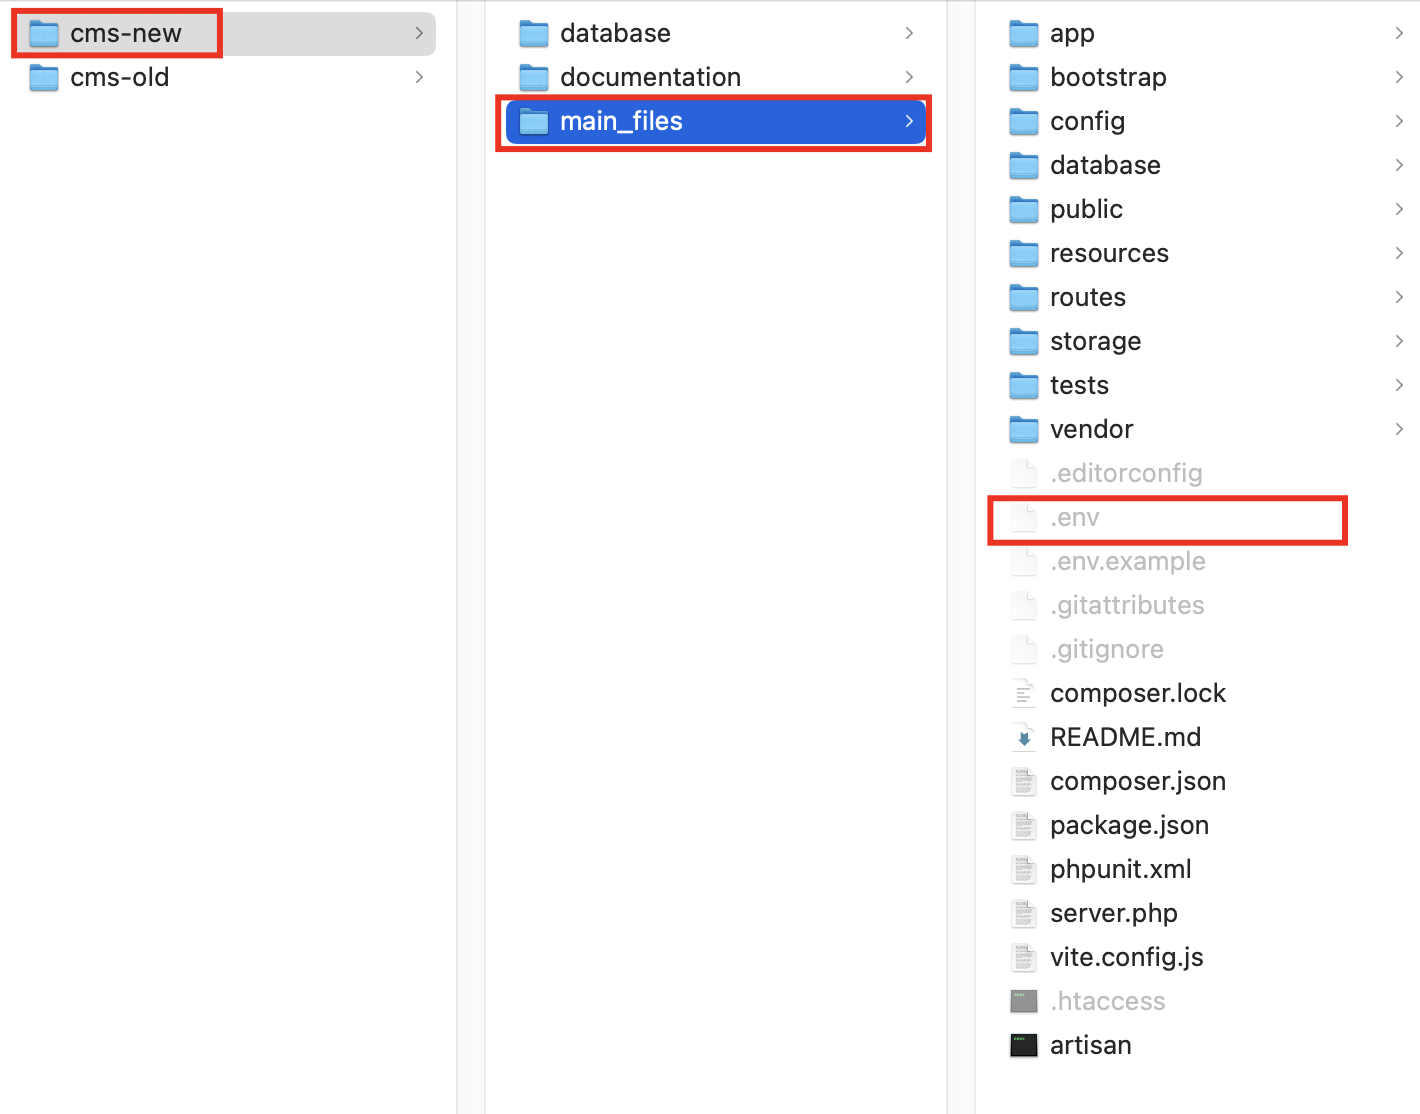
1. Download the main zip file from Codecanyon and extract it. You will get total 2 folders in there: cms-new and cms-old.
2. The cms-old folder is the previous version of this application which was developed using vanilla PHP. If you are my old customer and want something from the old version, you can check if for reference. If you are new customer, just avoid that and always use cms-new folder. The cms-new folder is the new version which is developed using Laravel framework. So, open this cms-new folder.
3. In this cms-new folder, you will get total 3 folders. These are documentation, database and main_files. This main_files folder contains the main source codes of the project.
4. Compress this main_files folder and name something like main_files.zip. Then upload this zip file into your server using FTP or Cpanel. Extract this into the server and use. You can install this application into the root or any subdomain.
5. Create mysql database using cpanel or your hosting provider's system. Then import the consultine.sql file (you will get it in database folder) into your created database.
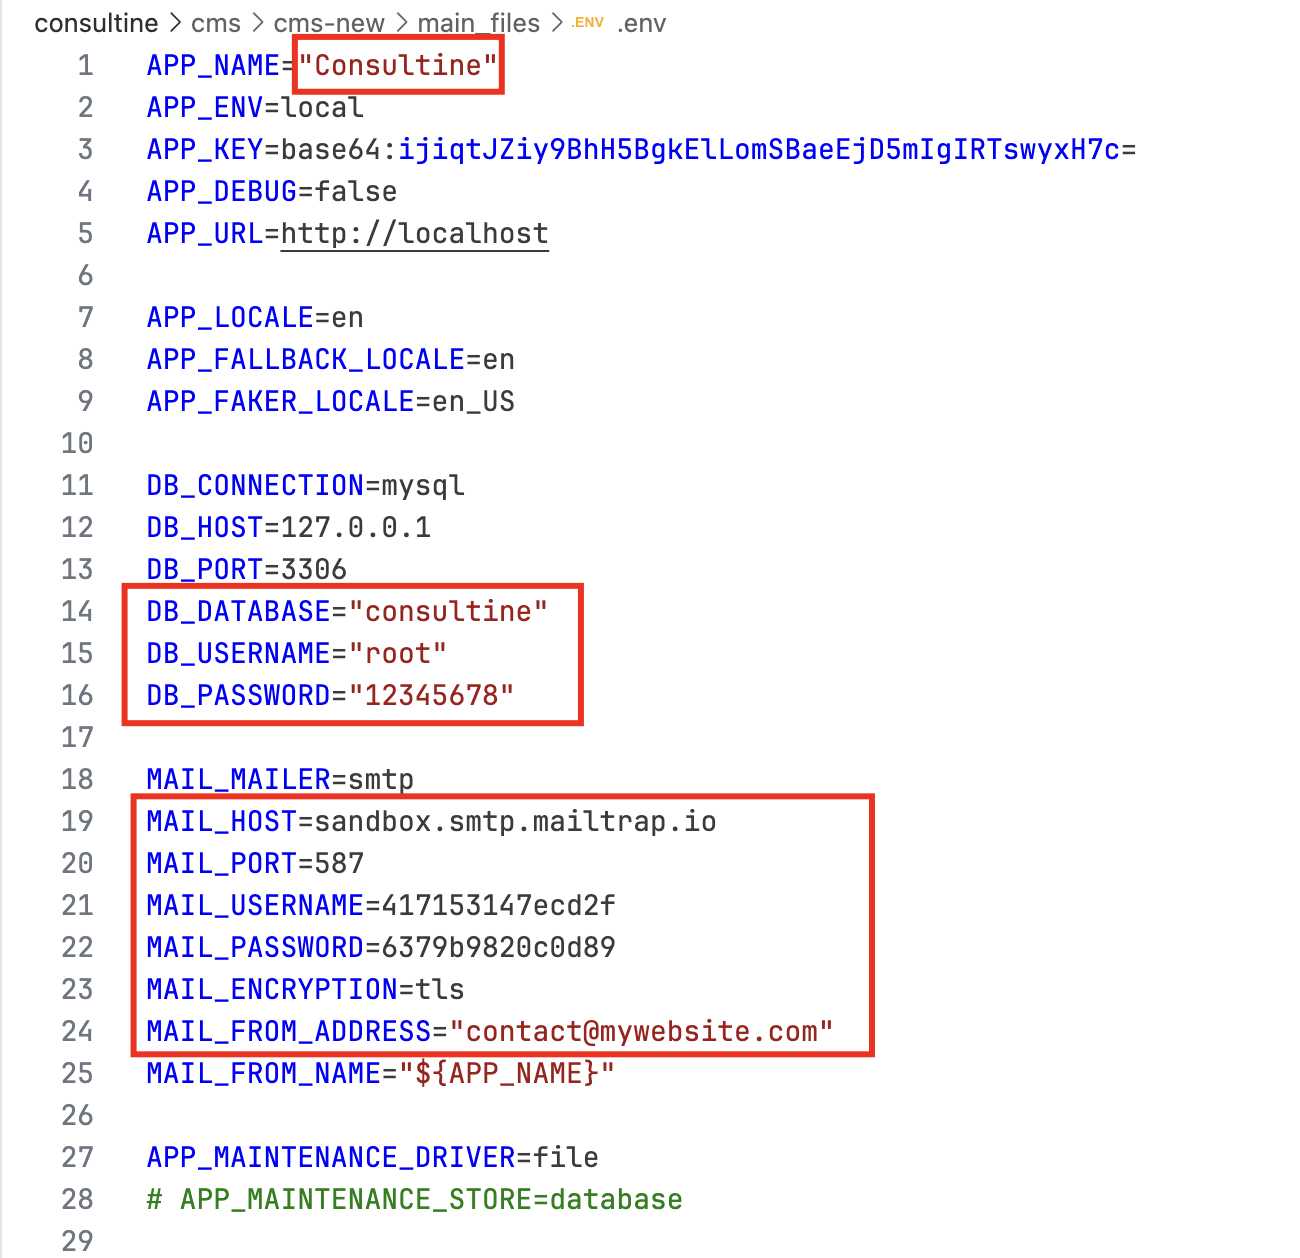
6. Open up the .env file of root with any text editor (for example: VS Code Editor or other).
7. In this .env file, you will get all the important configuration settings. You must have to edit those properly to work the script without any problem. Just change the mentioned values and the script will work without any problem.
APP_NAME: This will be your application name. So give any related name here.
In order to login to the admin panel, go to the url below:
http://www.yourwebsite.com/admin
Here "yourwebsite" is your main domain name. Just after your main url, you have to put "admin" and that's it.
Default Admin Login Credentials are:
Email: admin@gmail.com
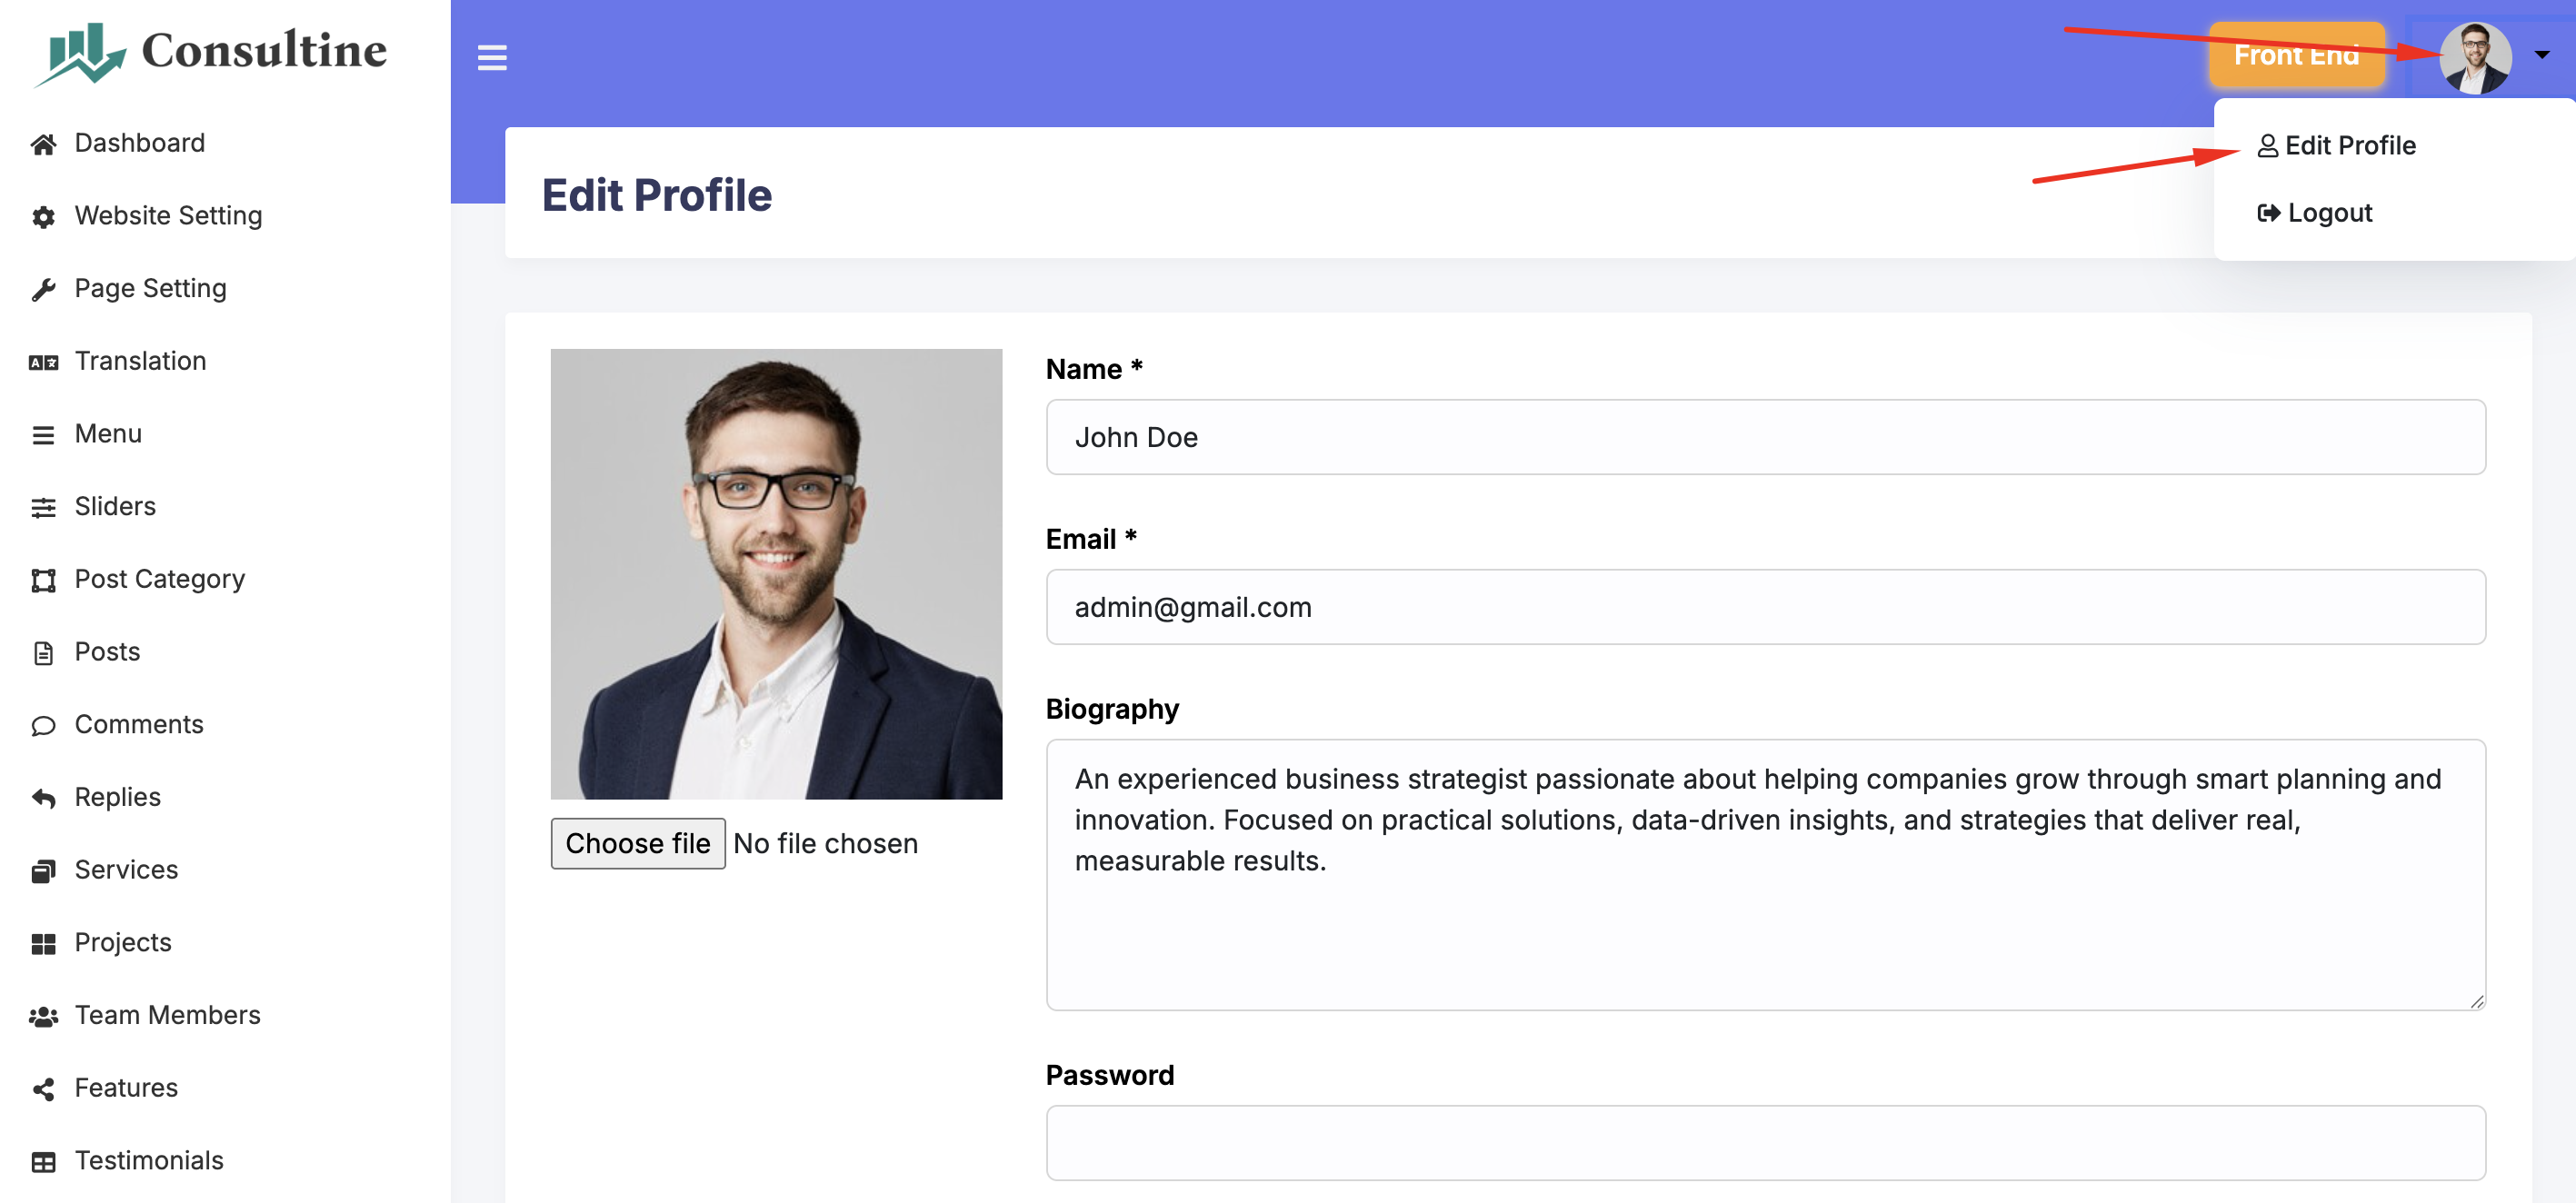
In order to change the profile information like admin login email, password etc., go to top right corner. Click on the photo and go to Edit Profile section.
If you want to translate the text of the website into your own language, you can do that easily from the translation options.
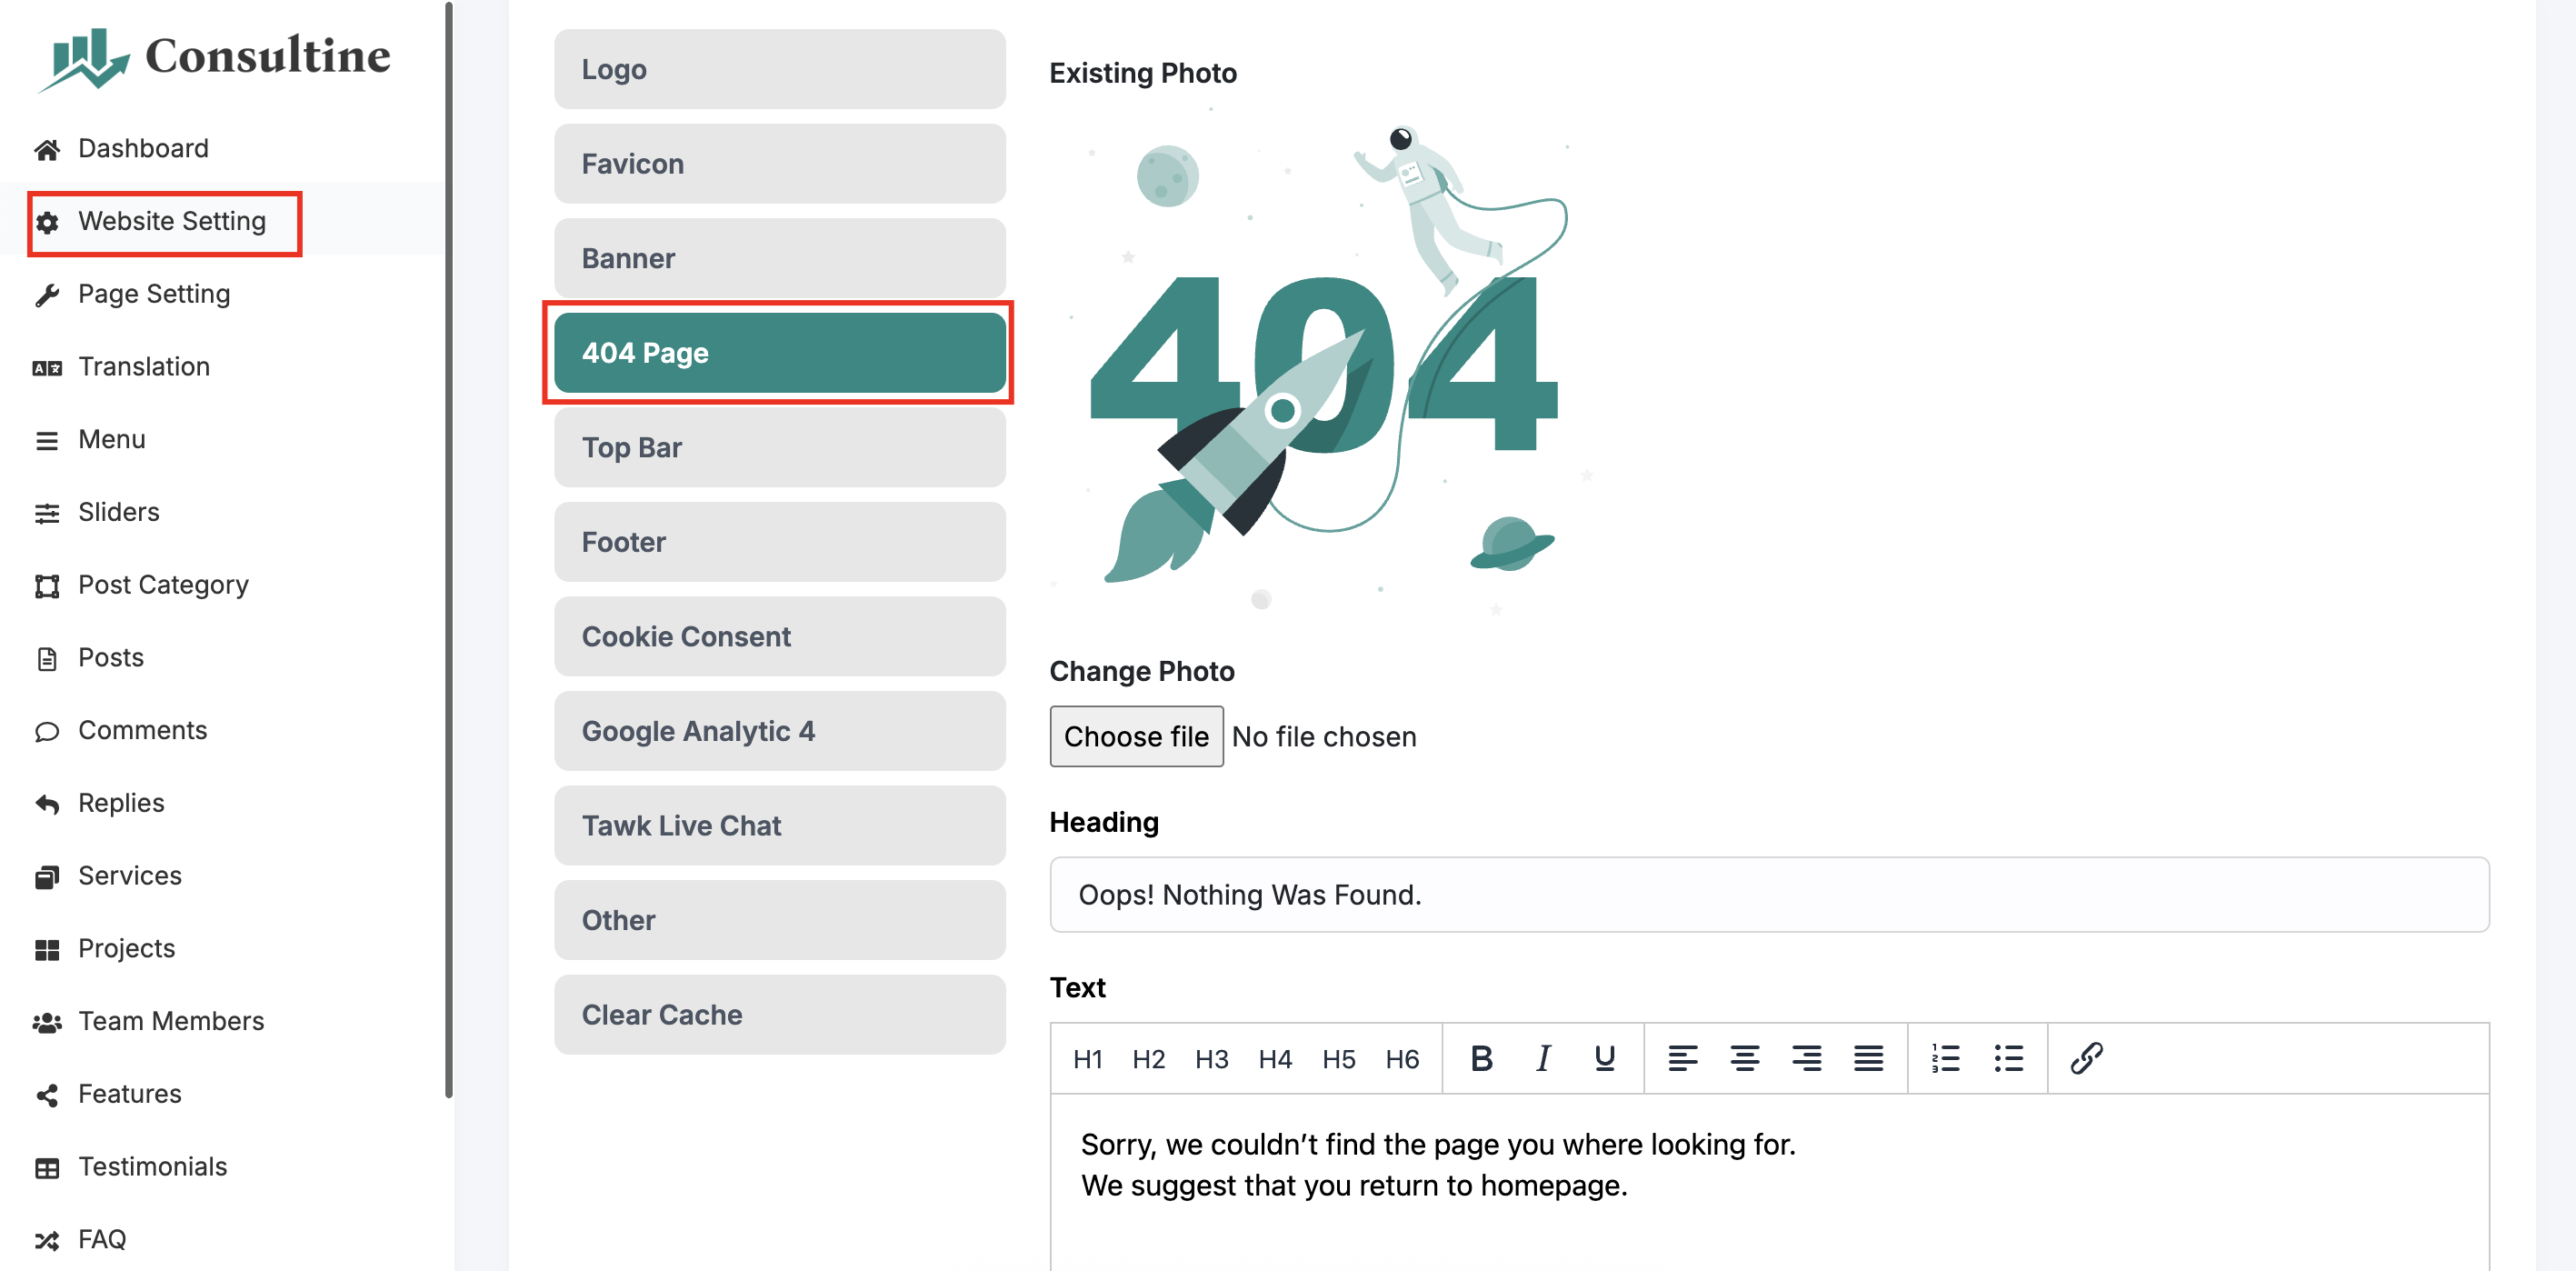
If you want to customize the 404 error page, you can do that easily from the 404 page settings.
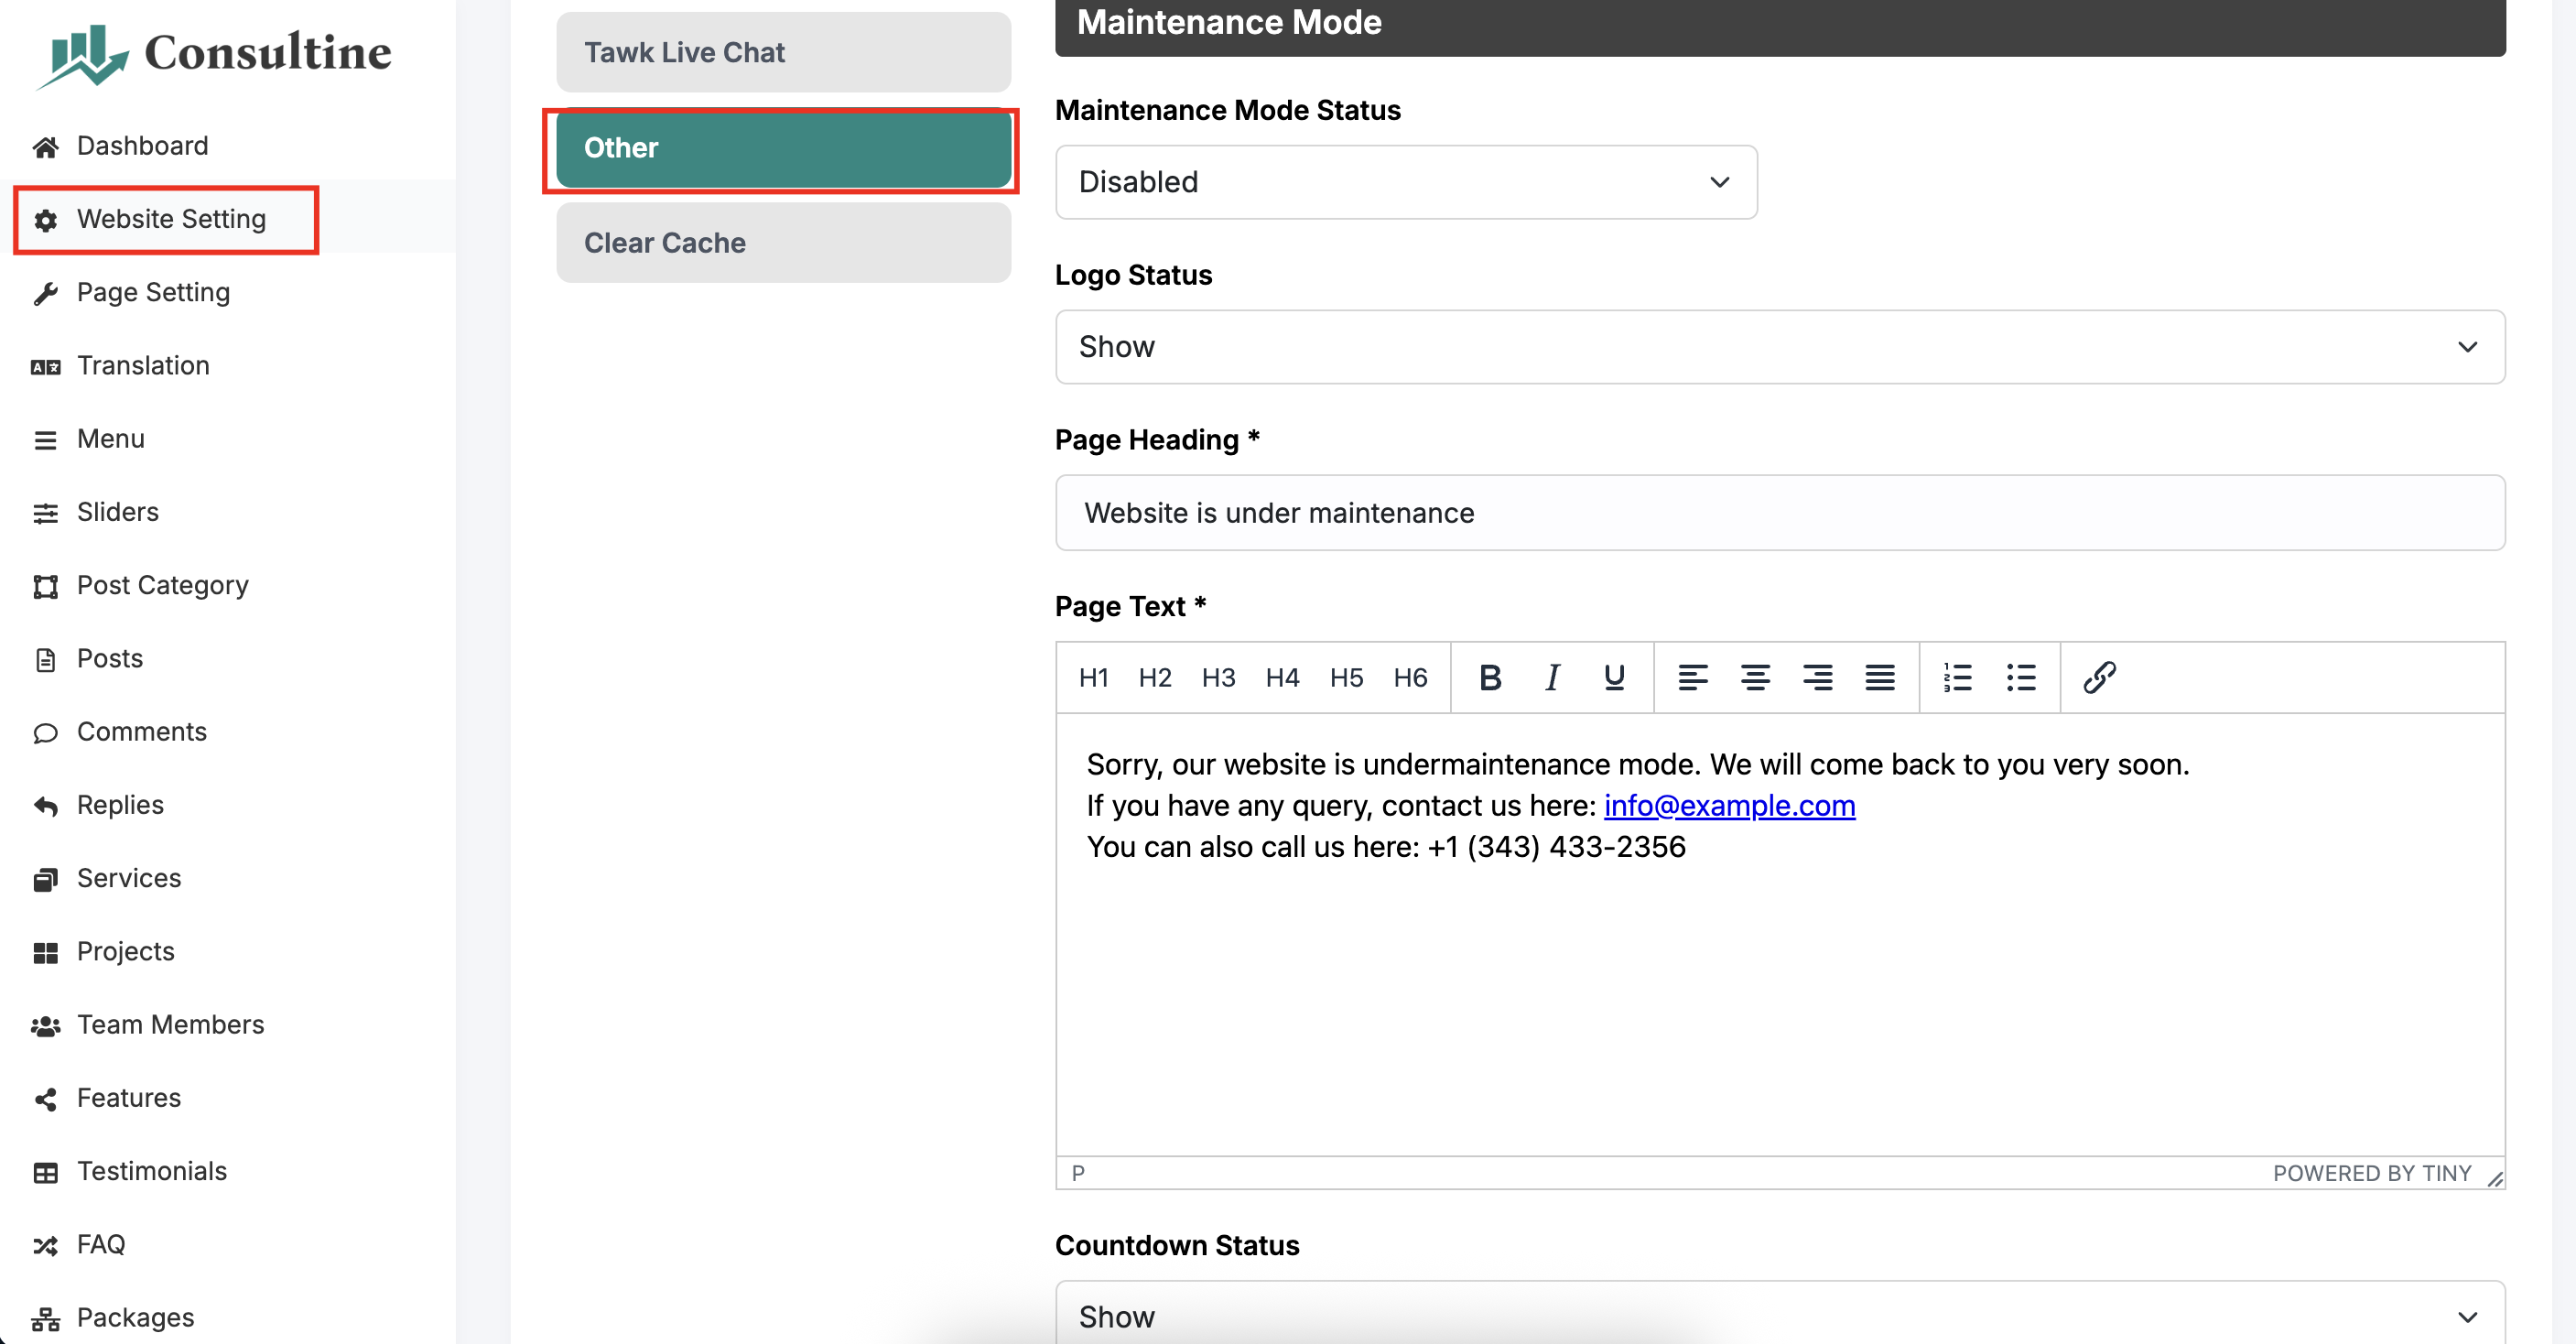
If you want to enable maintenance mode, you can do that easily from the maintenance mode settings.
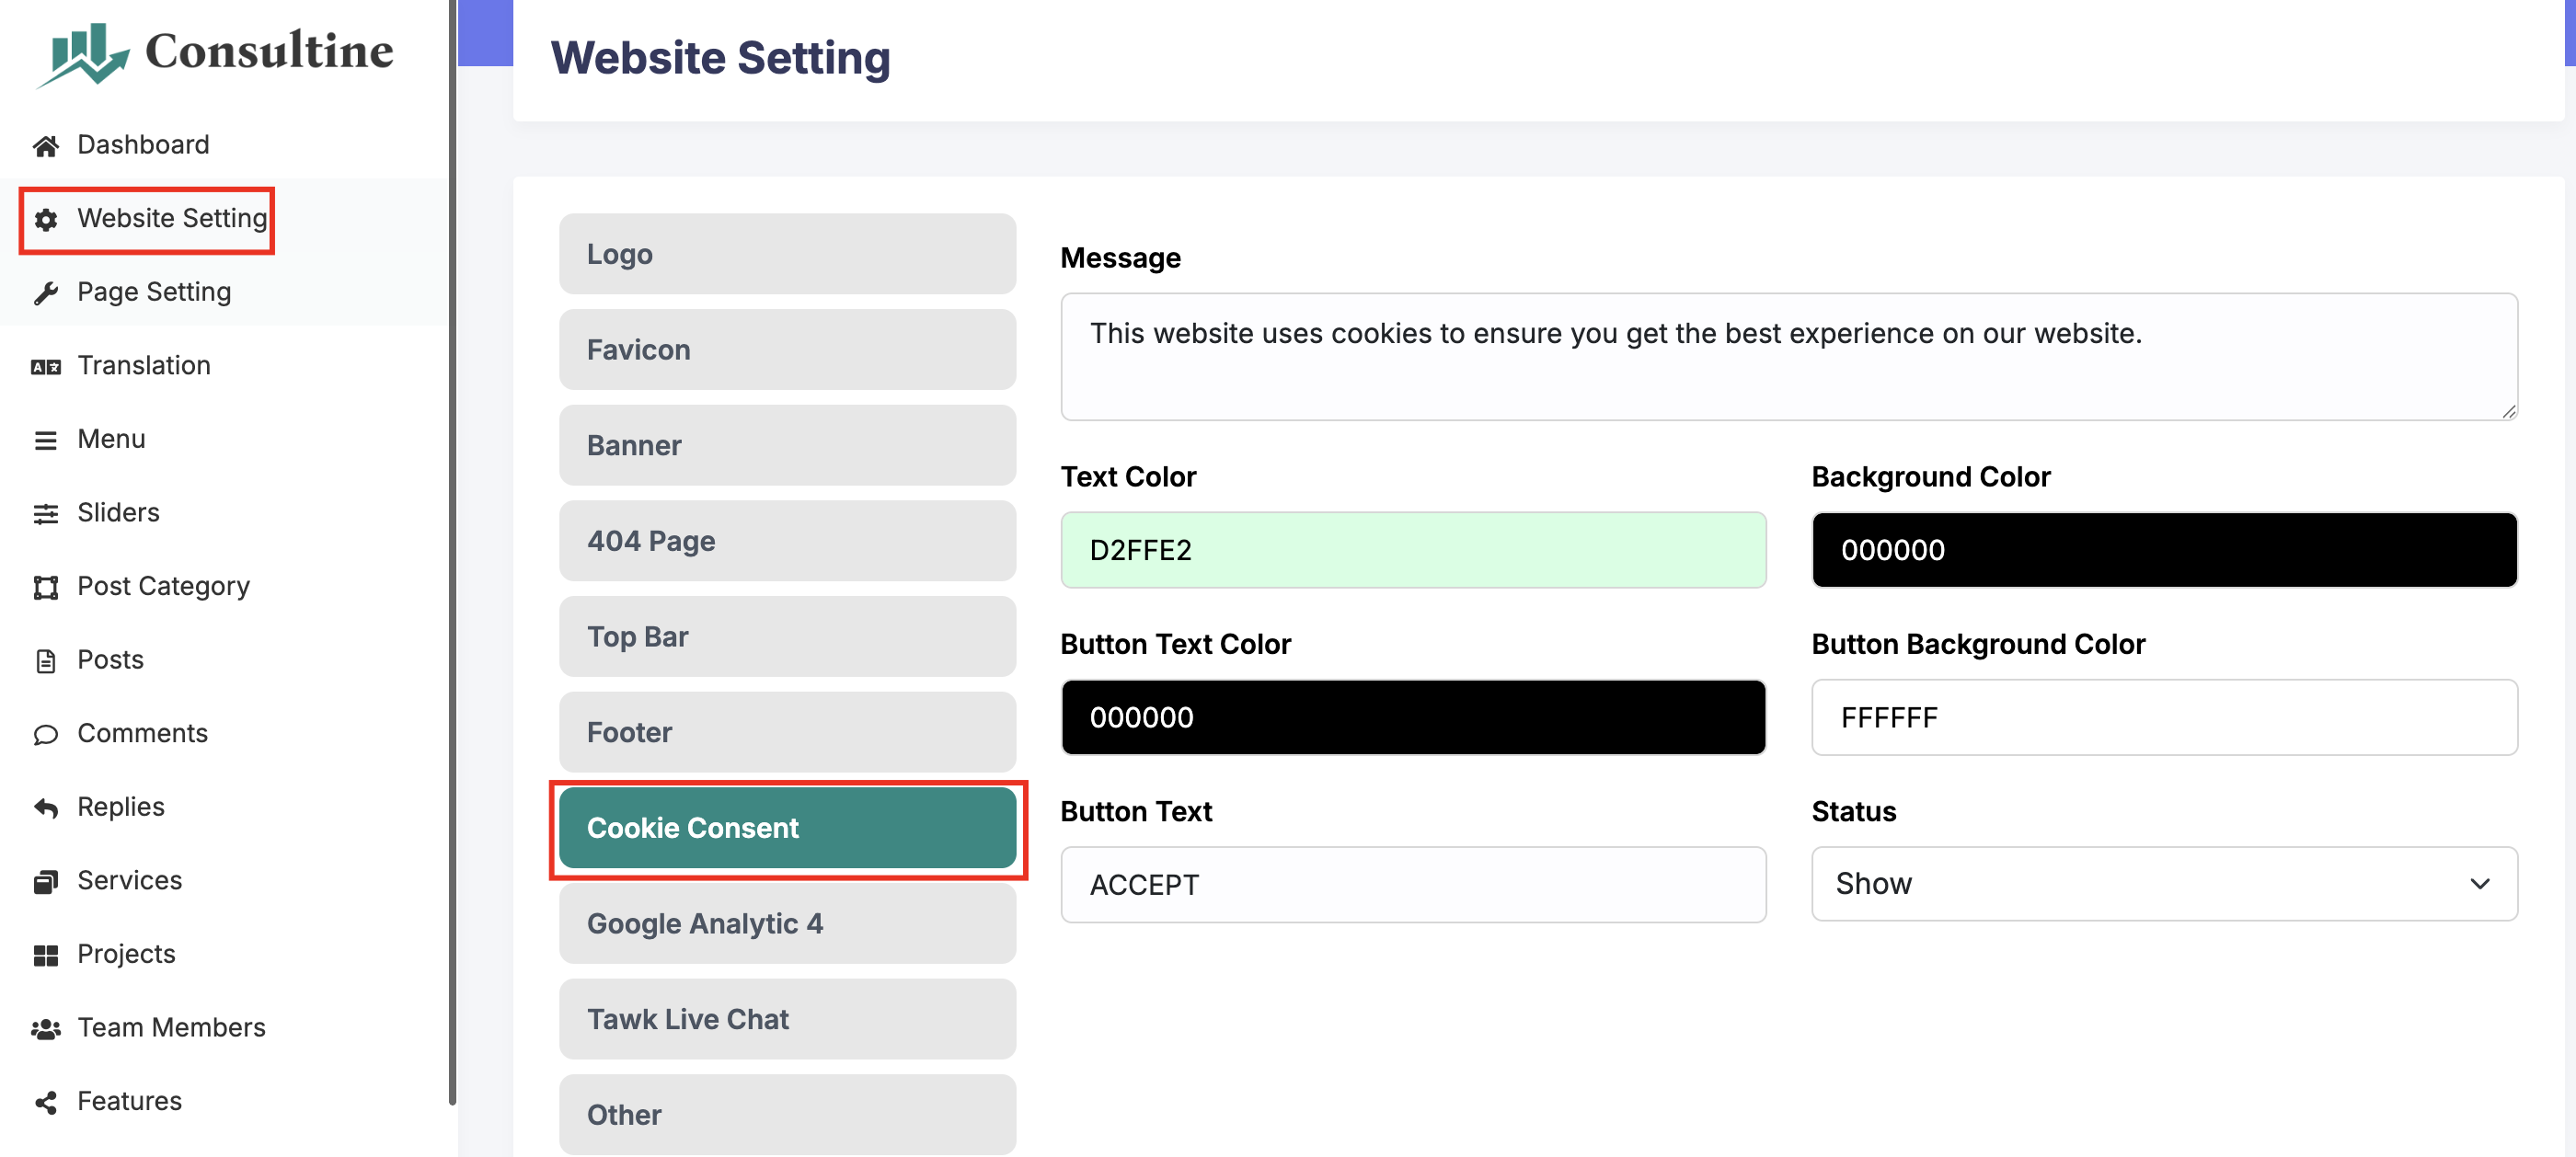
If you want to enable cookie consent, you can do that easily from the cookie consent settings.
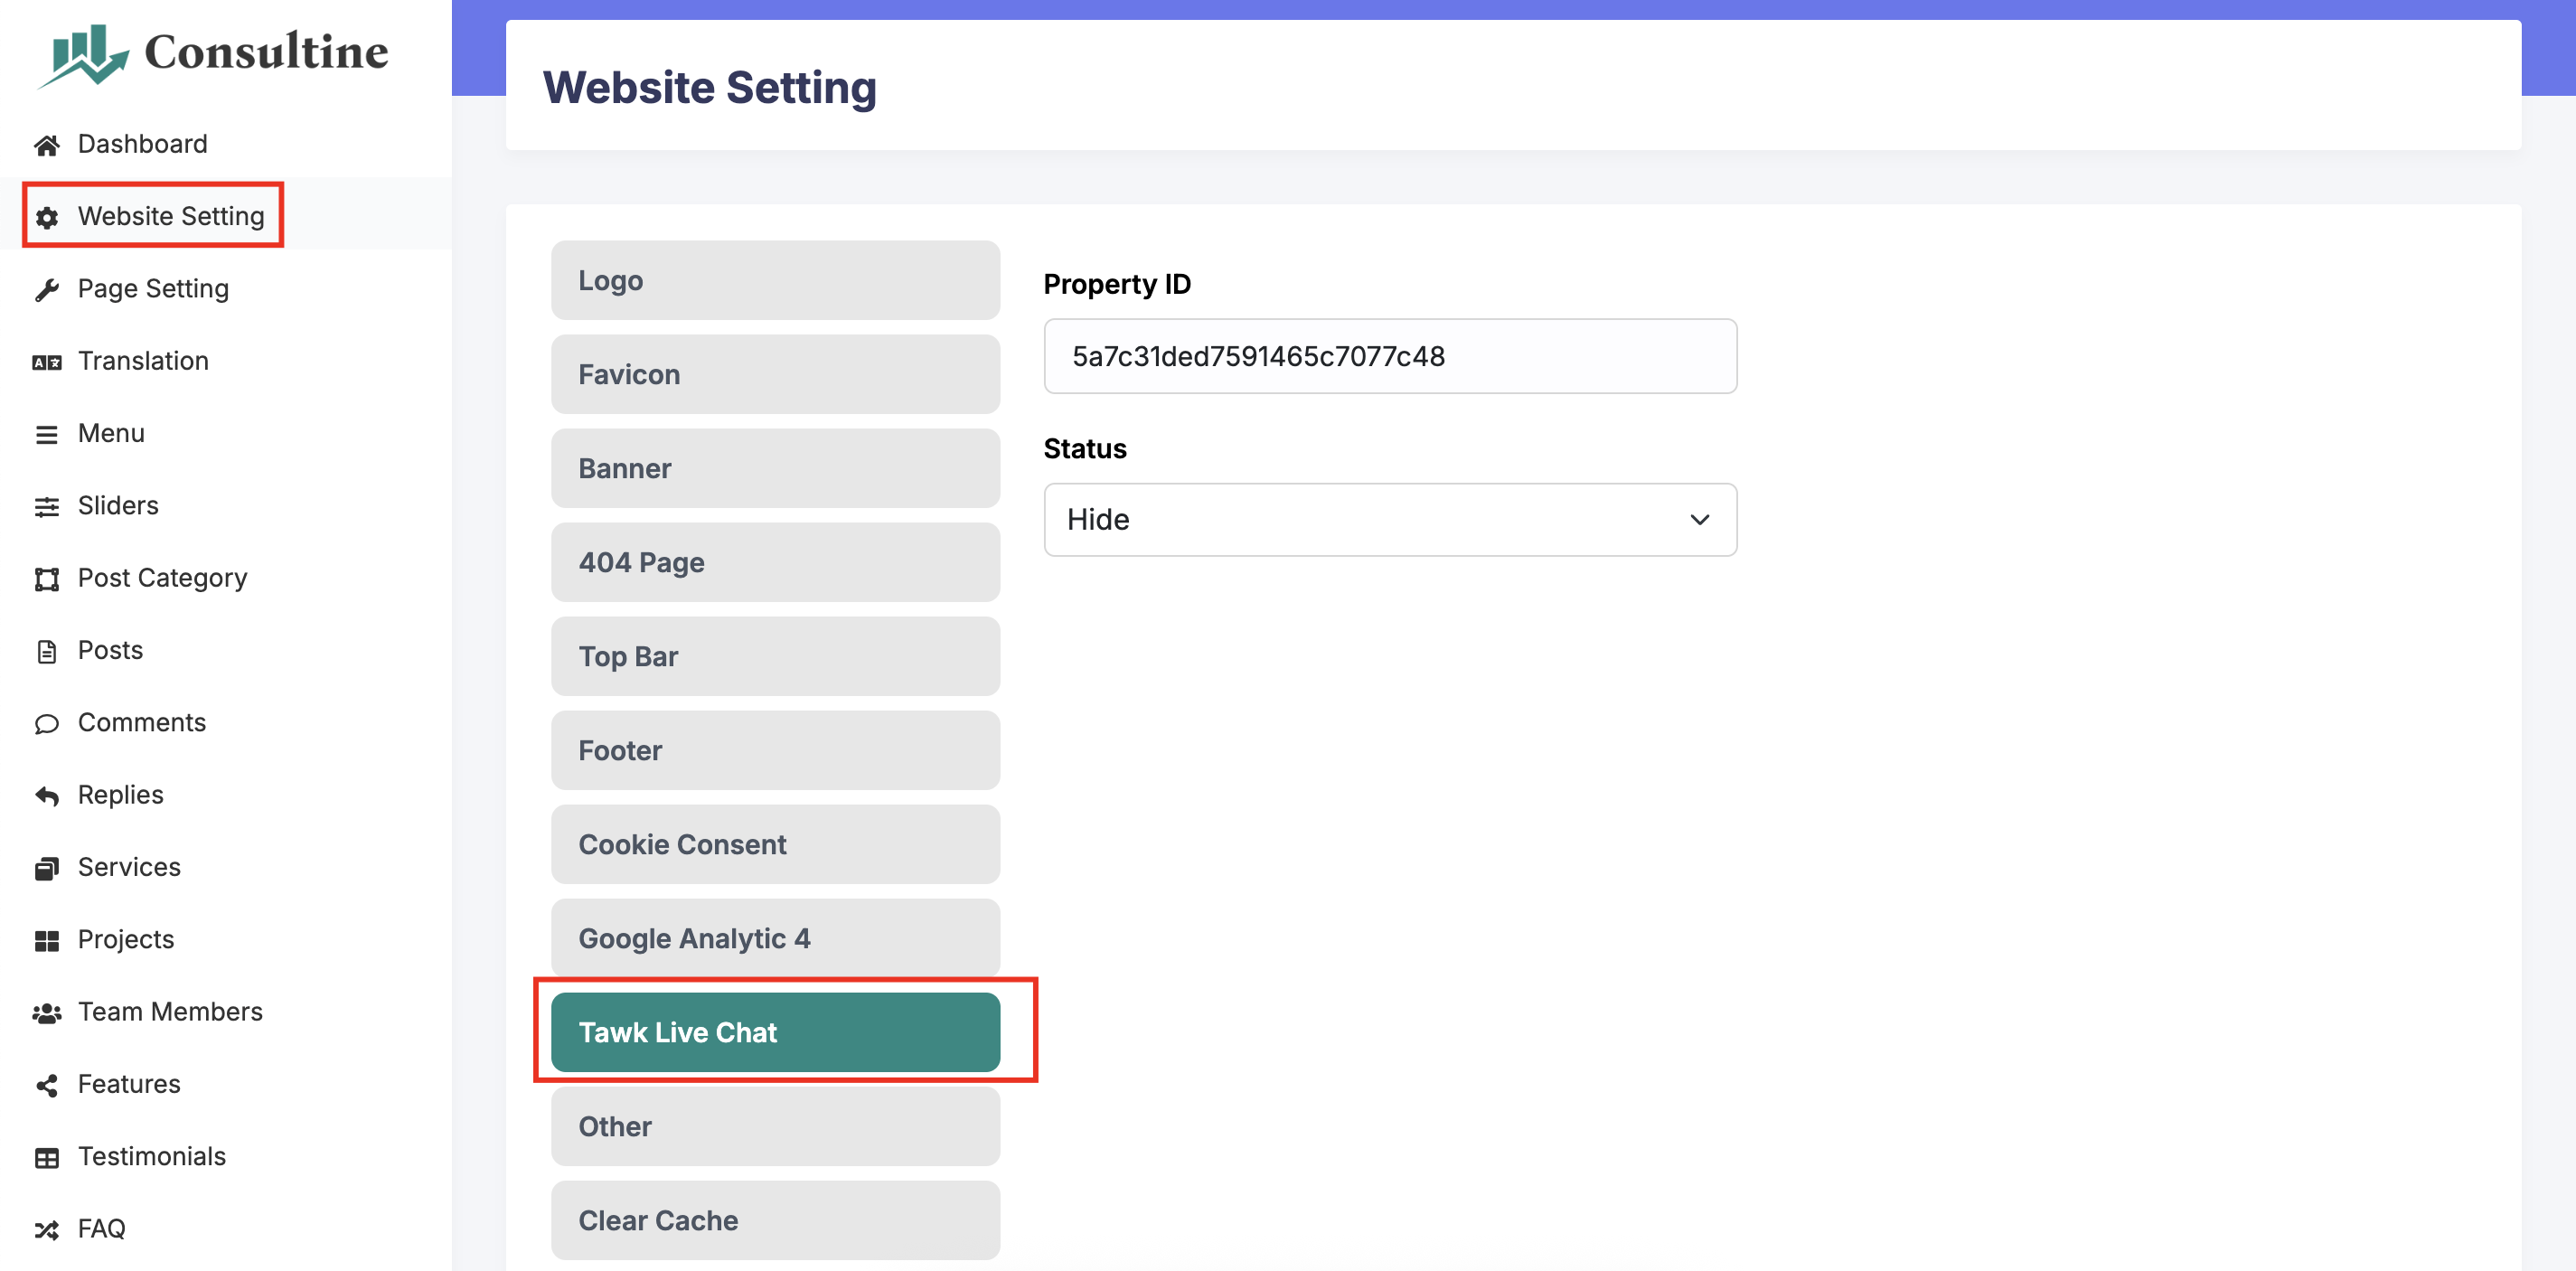
If you want to enable Tawk Live Chat, you can do that easily from the Tawk Live Chat settings.
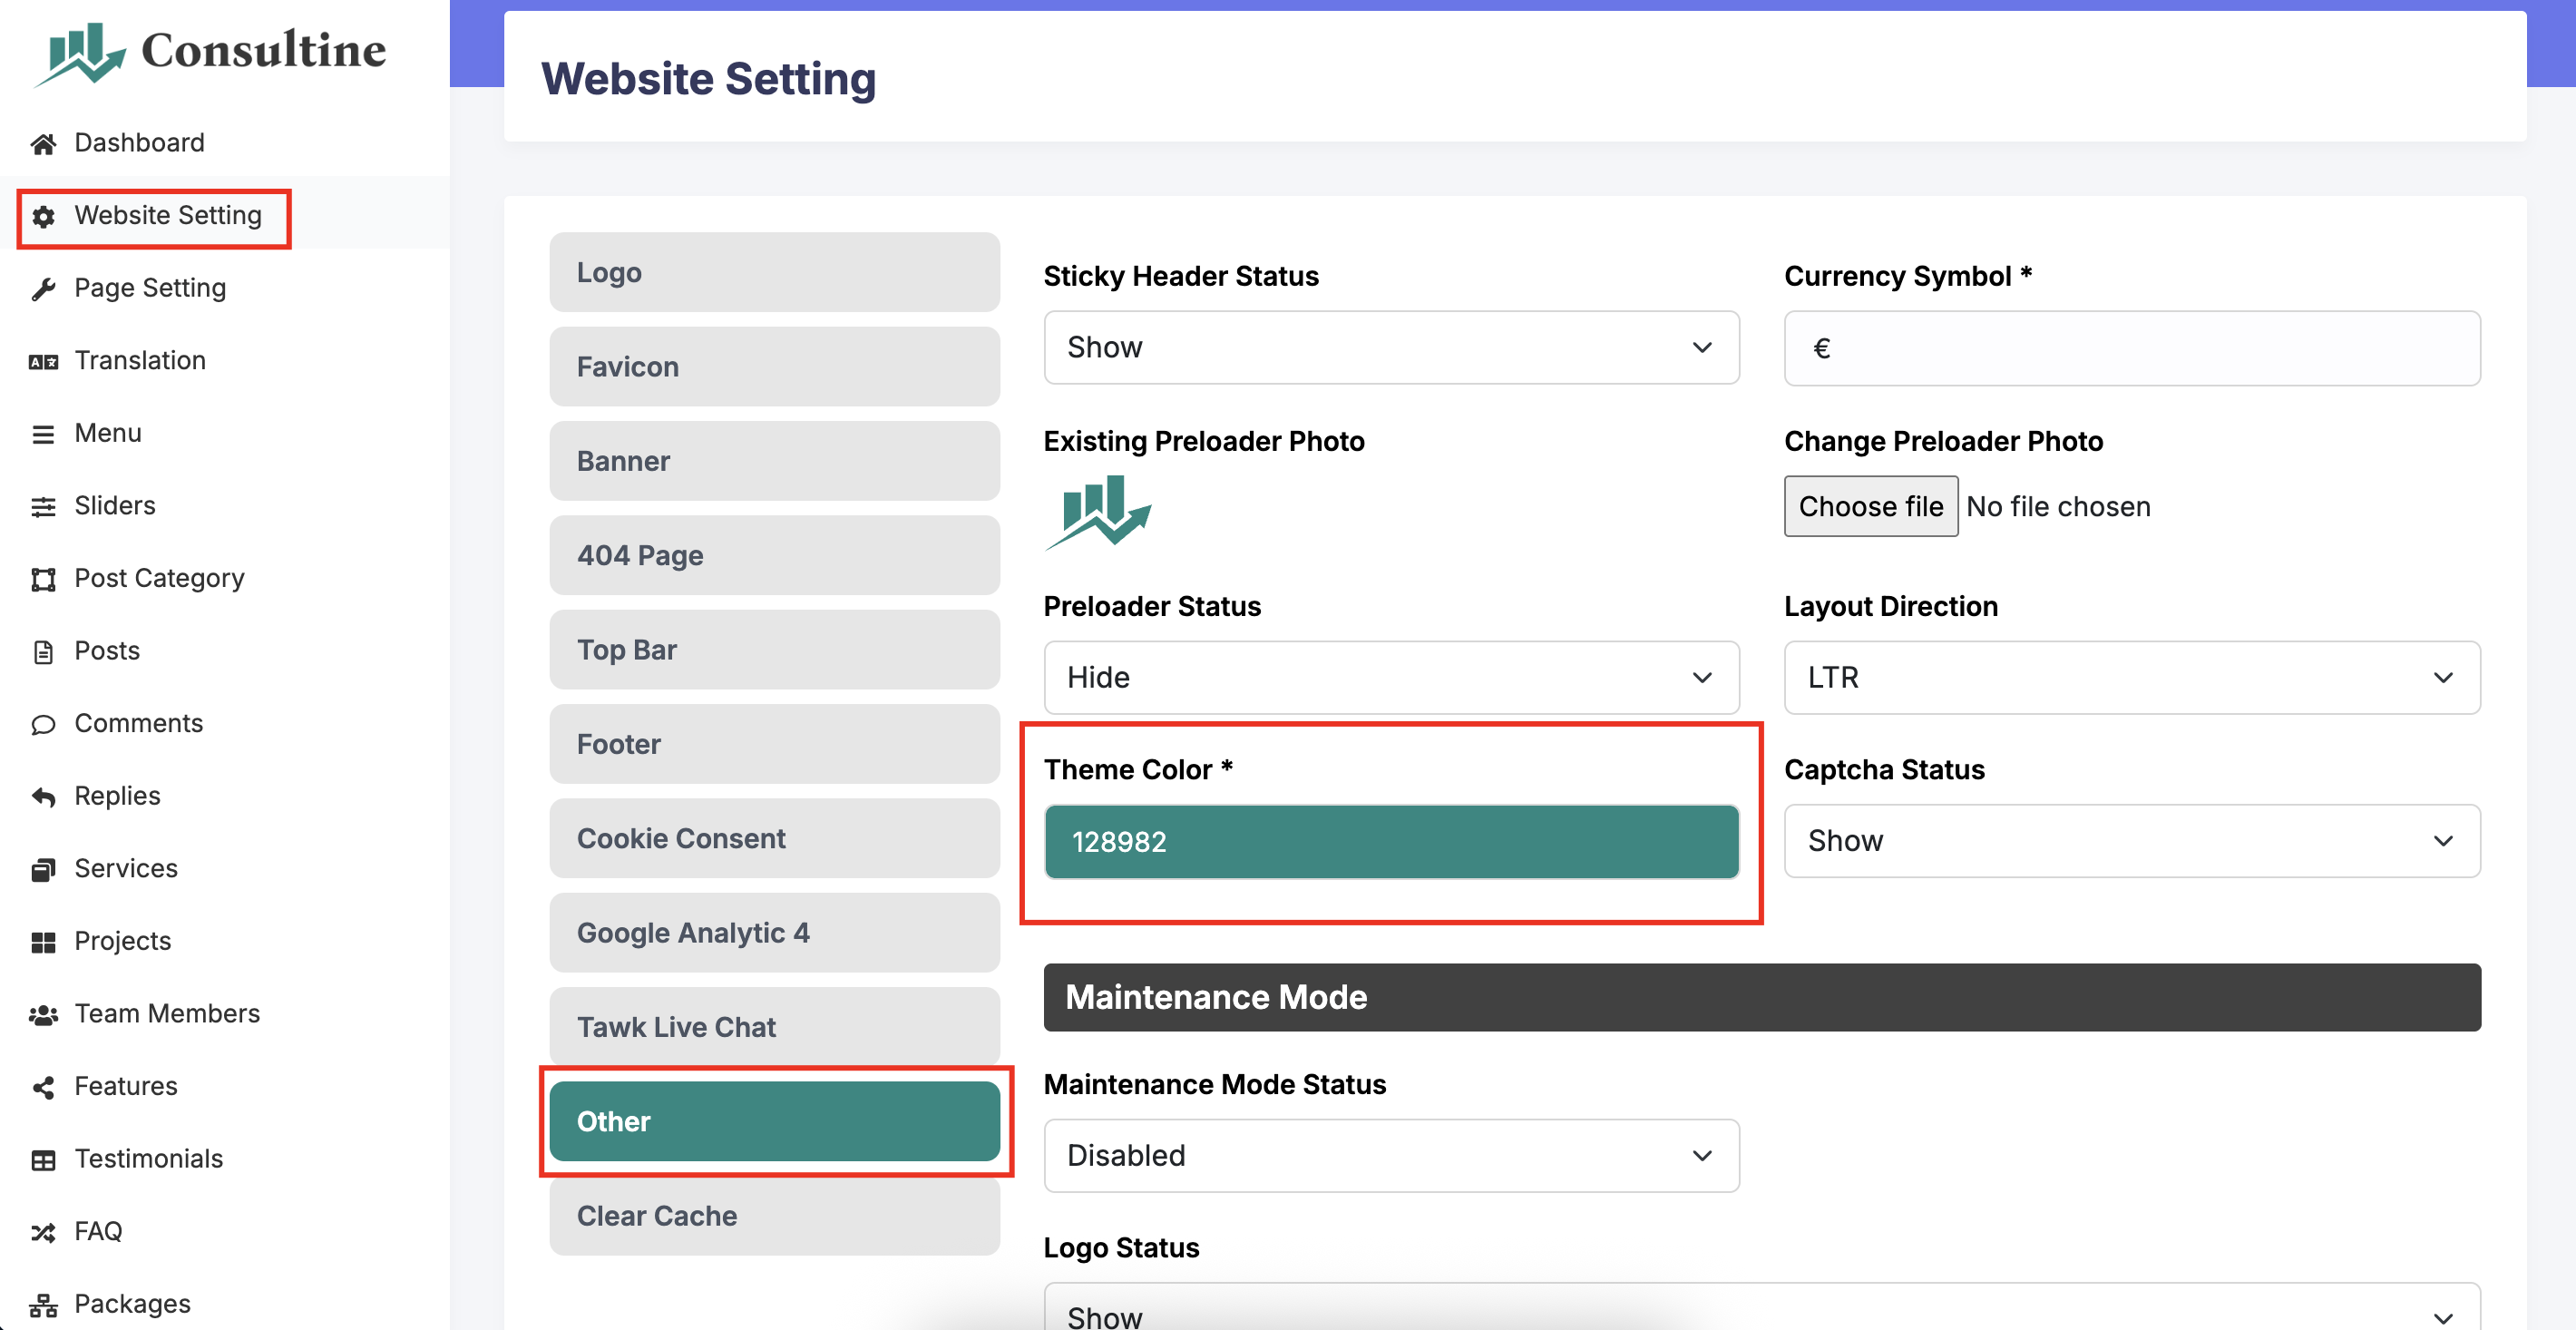
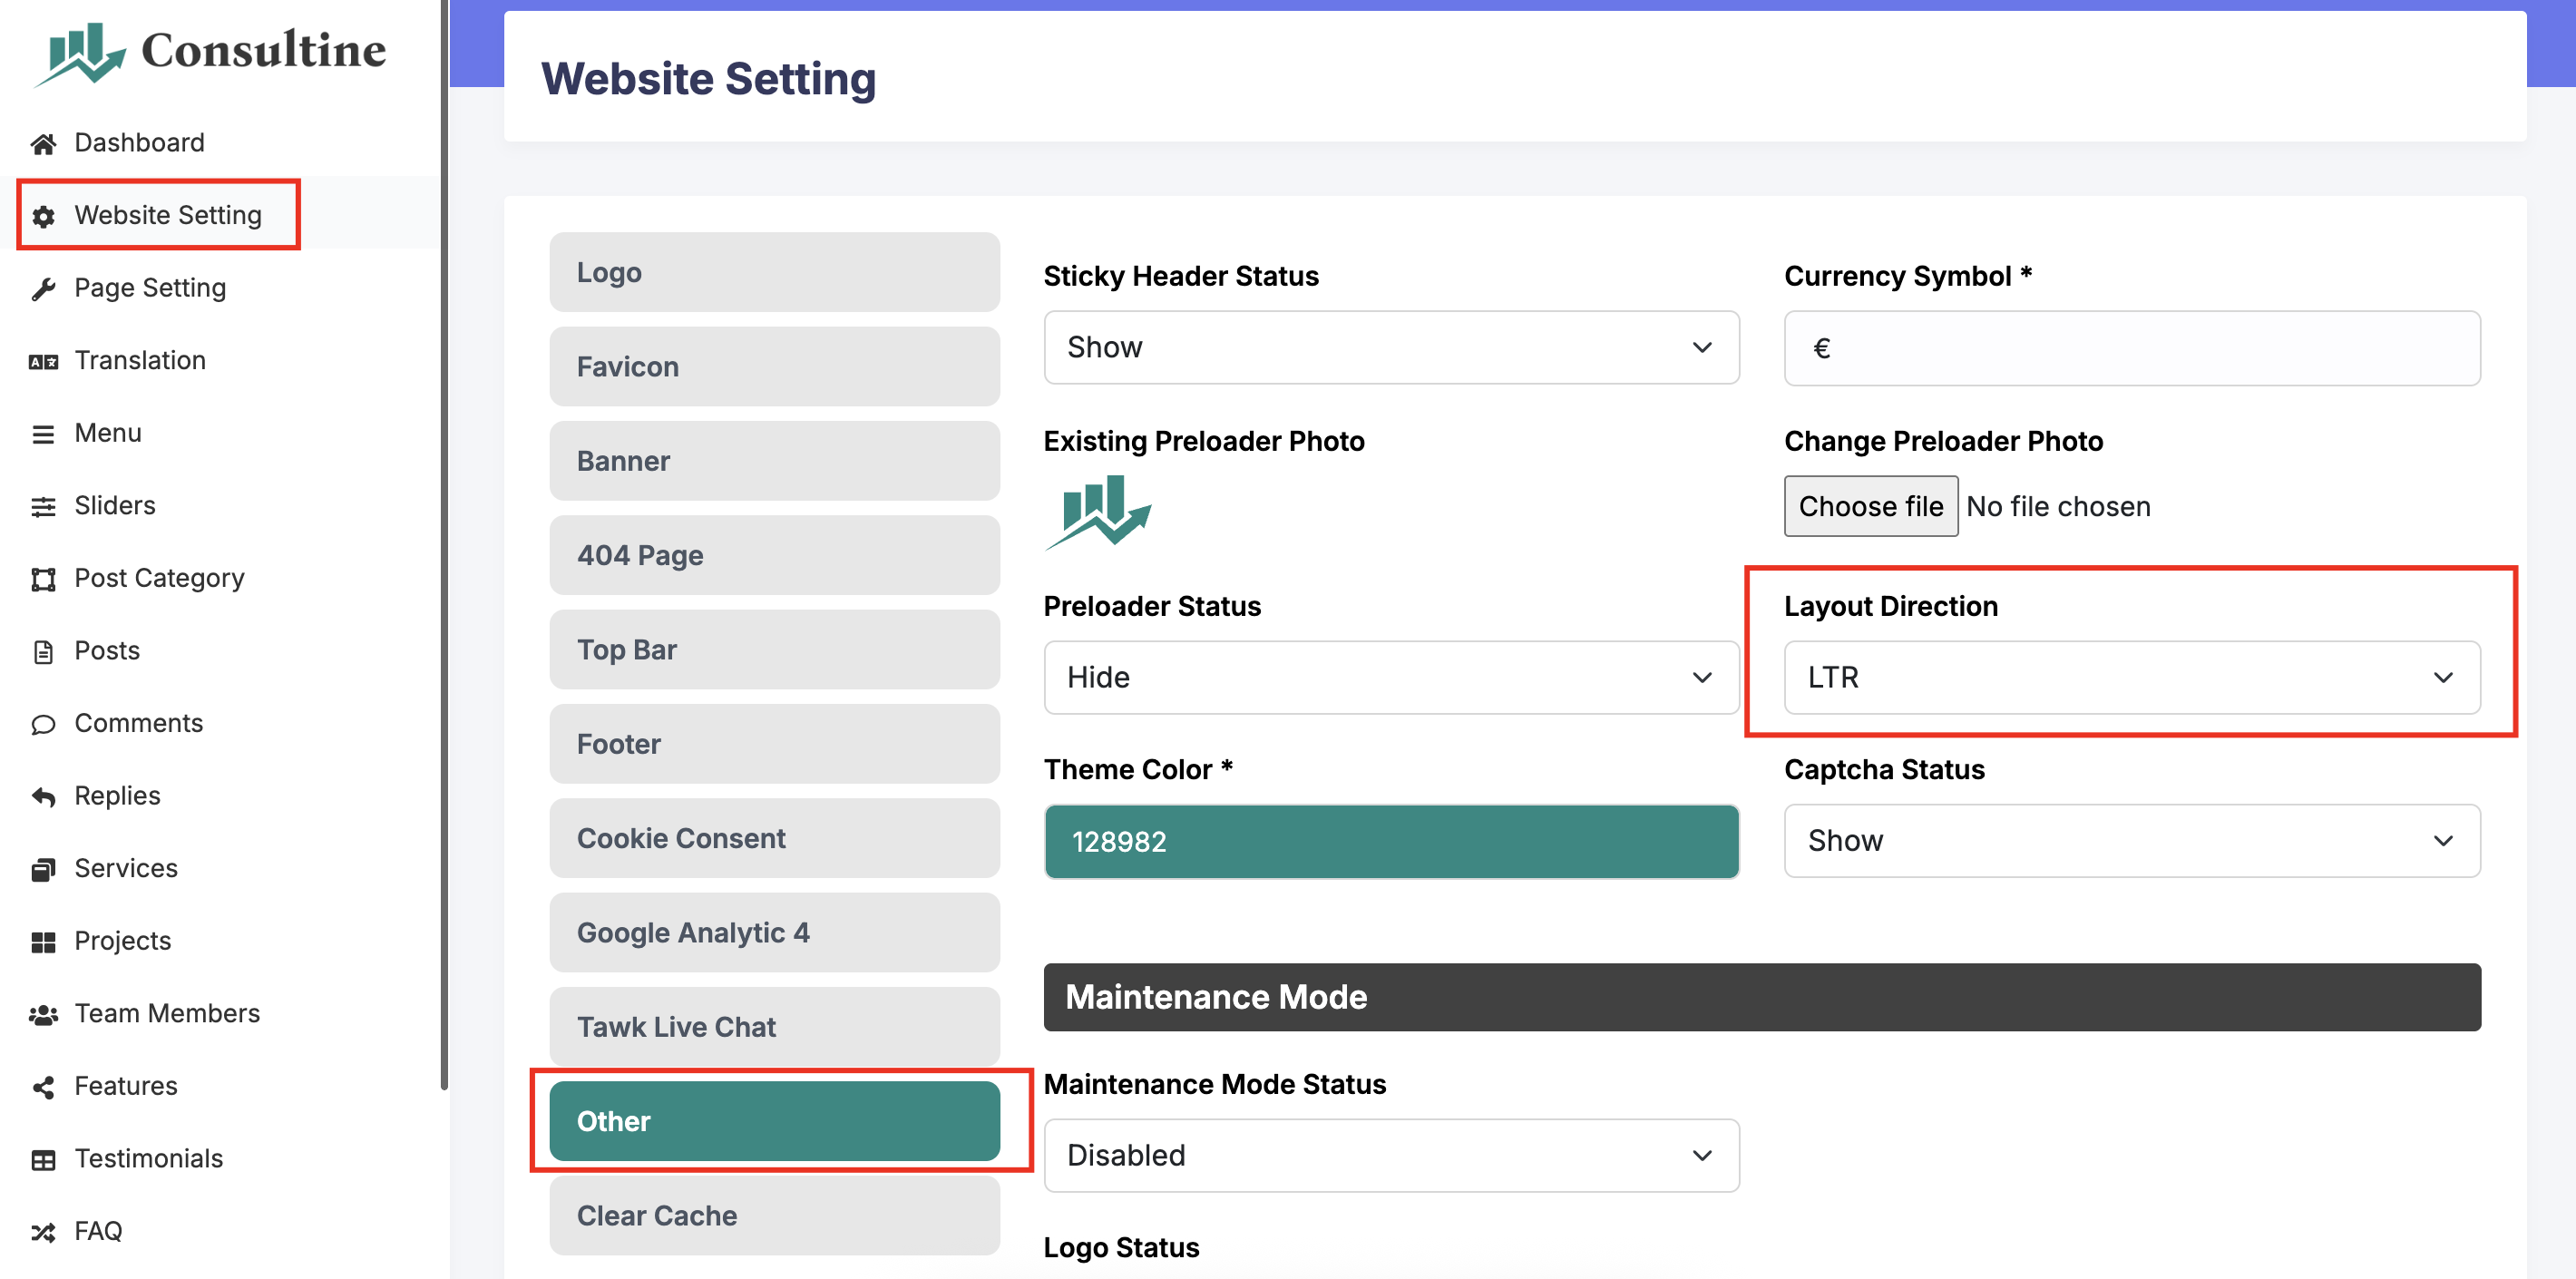
If you want to change the theme color of your website, you can do that easily from the theme color settings.
If your language is RTL based (like Arabic), then you can change the default LTR layout into RTL very easily.
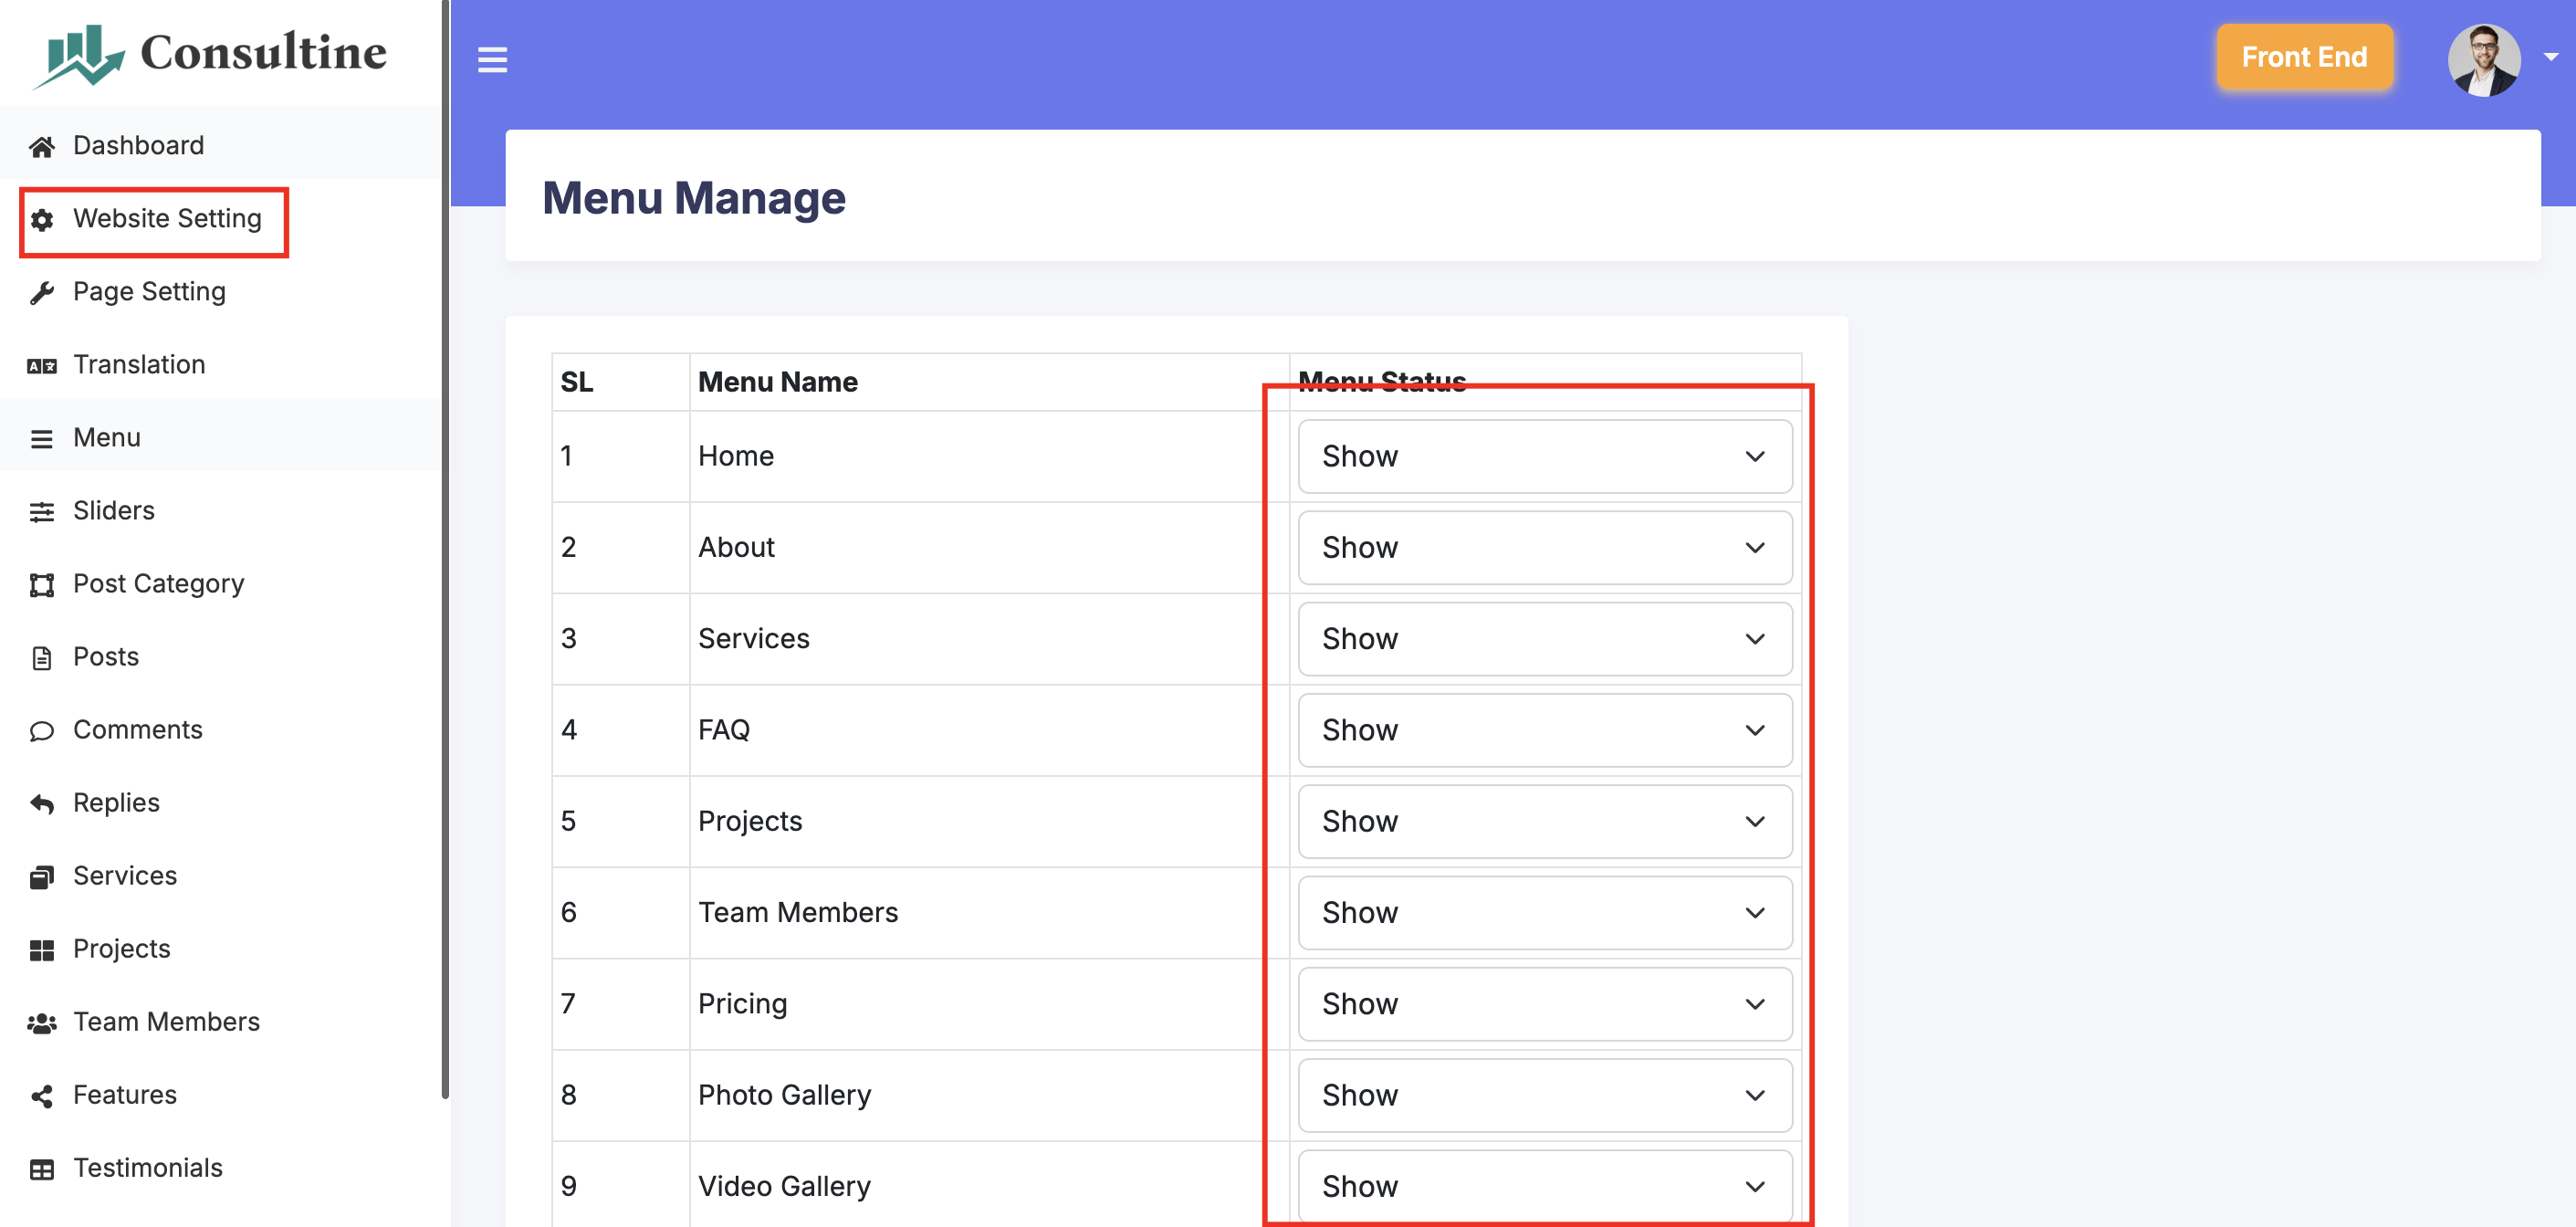
You can show or hide any menu from the menu manage option.
You will get all the details about an update in this section:
Email here to get support:
phpscriptpoint@gmail.com
You can also message me at WhatsApp: Laravel Version Used:
Features
Requirements
Installation
DB_HOST: Enter your database host name here. Normally it becomes localhost.
DB_PORT: Enter your database port number here. You can generally skip it to default.
DB_DATABASE: Create a database in your host (localhost or webhost) and put name.
DB_USERNAME: Username of the database you created.
DB_PASSWORD: Password of the database you created.
MAIL_MAILER: Put smtp here. Do not change it.
MAIL_HOST: Enter your smtp host name here. For example, if you are using gmail, then put smtp.gmail.com.
MAIL_PORT: Enter your smtp port number here.
MAIL_USERNAME: Enter your smtp username here.
MAIL_PASSWORD: Enter your smtp password here.
MAIL_ENCRYPTION: Enter mail encryption here. It will be normally tls or ssl.
MAIL_FROM_ADDRESS: Enter your email address here.
Admin Panel Login
Password: 1234
Profile Information
Translation Option
![]()
404 Page Setup
Maintenance Mode
Cookie Consent
Tawk Live Chat
Theme Color Setup
RTL Setup
Menu Manage
Update History
Version: 2.0 (November 01, 2025)
Overall Changes:
- Upgraded the whole script to Laravel 12.
- News options added in back end and front end.
- Completely changed the front end and back end template. It is a modern design now.
Version: 1.9 (January 28, 2024)
Overall Changes:
- Fixed the mail sending issue for php 8.1 or above. Replaced the swiftmailer with phpmailer.
- Fixed bug in home menu edit option.
- Fixed bug in menu edit option.

Changed Files:
- consultine/cms/footer.php
- consultine/cms/header.php
- consultine/cms/page.php
- consultine/cms/admin/header.php
- consultine/cms/admin/menu-edit.php
- consultine/cms/admin/settings.php
- consultine/cms/admin/subscriber-email.php
- consultine/cms/admin/team-member-edit.php

Changed Database Table:
- tbl_setting_email: added field: "smtp_encryption"
Version: 1.8 (August 23, 2022)
Overall Changes:
- Made the script compatible with php 8+
- Removed phpmailer system and added swiftmailer

Changed Files:
- footer.php
- header.php
- news.php
- page.php
- admin/settings.php
- admin/subscriber-email.php

Added Folder:
- vendor

Removed Folder:
- assets/mail

Removed Table Columns:
- tbl_setting_email: "smtp_active", "smtp_ssl"
Version: 1.7 (April 05, 2021)
Overall Change
- Updated config file
- Added summernote editor
- Editor choosing option in admin panel
- Added preloader on/off option
- SMTP with PHPMailer added to send emails
- Moved the admin style.css file into css folder

Moved Files:
Moved root > admin > style.css into root > admin > css > style.css

Changed Files:
root > page.php
root > header.php
root > footer.php
root > admin > config.php
root > admin > header.php
root > admin > footer.php
root > admin > settings.php
root > admin > subscriber-email.php
root > admin > css > style.css

Added Files:
root > admin > css > summernote.css
root > admin > js > summernote.js
root > admin > fonts > summernote.eot
root > admin > fonts > summernote.ttf
root > admin > fonts > summernote.woff

Added Table Rows:
tbl_language (3 items added: "CONTACT_FORM_MESSAGE", "CONTACT_FORM_SUCCESS_MESSAGE", "SUBSCRIPTION_SUBJECT")
Version: 1.6 (January 04, 2020)
- Removed summernote editor and added ckeditor.
- Fixed the database to support unicode characters properly.
- Added a short description field for the single news.
Version: 1.5 (March 05, 2019)
1. Added the floated cookies message.
2. Added option to send email to the subscribers.
Version: 1.4 (January 21, 2019)
Fixed: Some minor changes in css to fix some responsive issues.
Version: 1.3 (October 09, 2018)
Fixed: Adding menu code in admin panel is fixed.
Version: 1.2 (August 14, 2018)
1. Added meta information in admin panel for the single service pages.
2. Created database fields for the single service page meta information.
3. Changed the header.php file to show the service page meta information.
Version: 1.1 (August 02, 2018)
Overall Change:
1. Changed: Changed the normal email sending system and added PHPMailer to send email more perfectly.
2. Added: Added the language option in the backend.
3. Added: Added the front end theme color changing options.
Version: 1.0 (July 12, 2018)
Initial Release
Support
https://wa.me/+8801912721070